My right IT band used to lock up so badly after long trail runs that going down stairs was a legitimate problem. Not metaphorical pain. Actual, white-knuckling-the-handrail pain. I tried rolling it the way I had seen guys do it at the gym, which mostly meant parking the roller directly on the tightest spot on my outer knee and grinding until I wanted to tap out. That approach made things worse every single time. It took two conversations with a physical therapist friend and a lot of trial and error to figure out what foam rolling your IT band and quads actually requires. This guide covers what I learned: the exact positions, the right amount of pressure, how long to stay on each spot, and what the sensation difference is between productive discomfort and the kind of pain that means you should stop. The tool that finally got me rolling correctly was a firm ProsourceFit High Density Foam Roller, and most of what changed was technique, not effort.
One thing upfront: the IT band itself is a thick rope of fascia, not a muscle. You cannot stretch it and you cannot really lengthen it with a foam roller. What you can do is release the tension in the tissues around it, specifically the TFL muscle at your hip, the lateral quad fibers that run alongside it, and the glute-IT band junction near your hip. That shift in understanding completely changed how I approach rolling, and it is why the steps below focus on tissue surrounding the IT band rather than the band itself.
Tight IT bands and quads need a roller that does not bottom out under pressure
The ProsourceFit High Density Foam Roller holds its shape even when you drive your full body weight through it. At this price, there is no reason to waste a session on a soft roller that compresses to nothing the moment you load it.
Amazon Check Today's Price on Amazon →Step 1: Get Your Roller and Starting Position Right
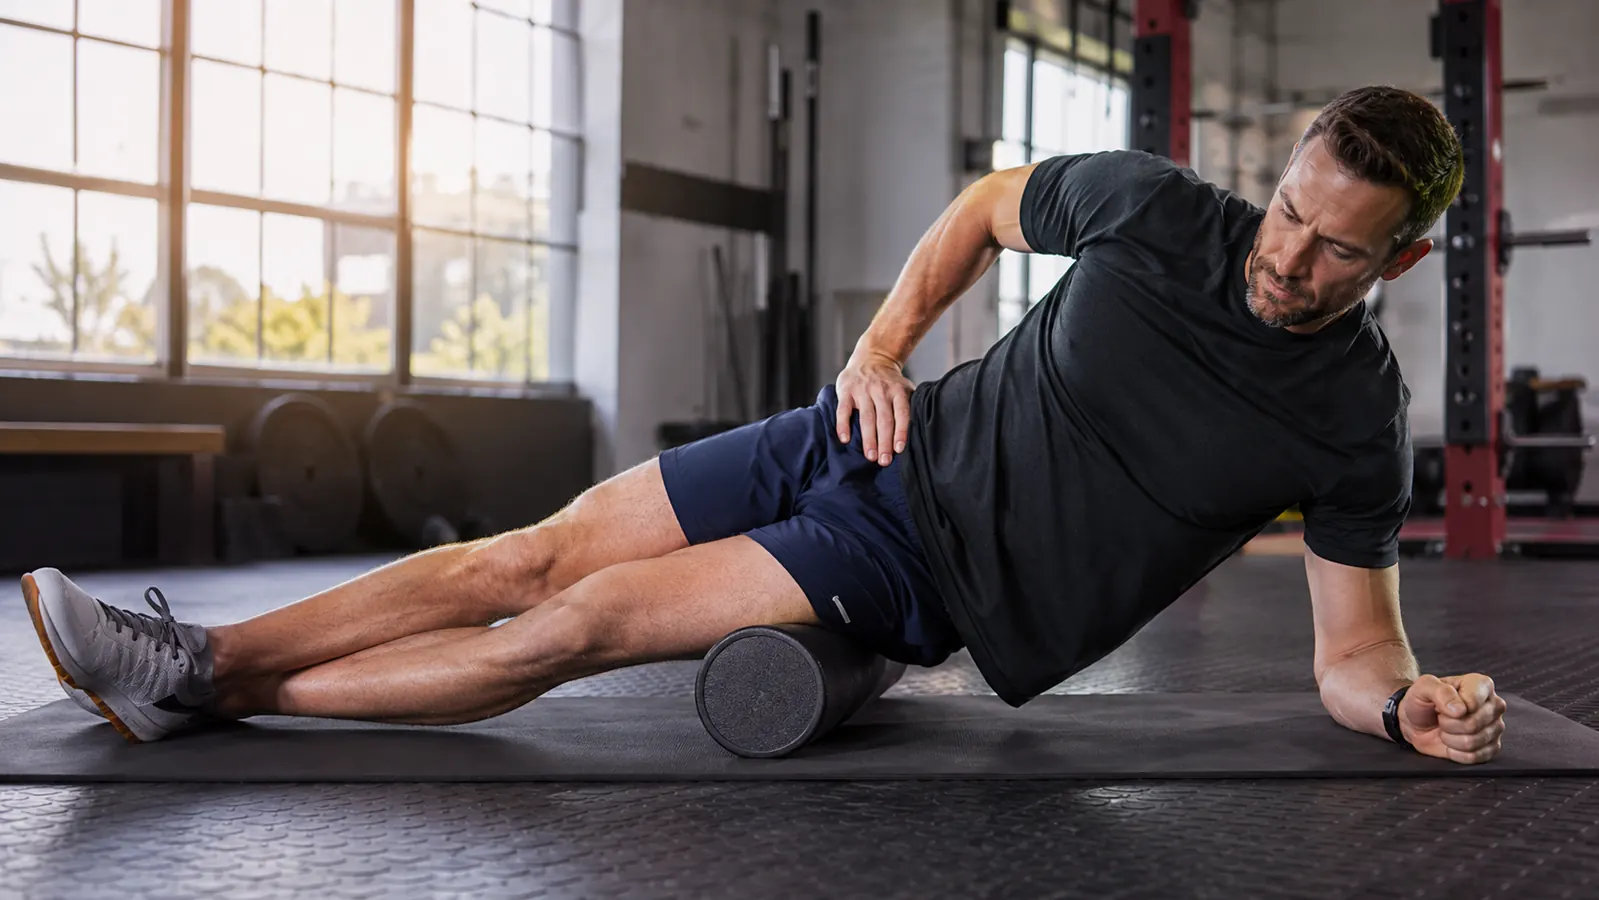
Lay the foam roller perpendicular to your body, not parallel. You are going to lie on your side with the roller under your outer thigh, starting just below your hip joint. Support your upper body on your forearm, not your palm. This takes your wrist out of the equation and gives you more stability to control how much weight you are driving into the roller. Your top leg can be bent with the foot flat on the floor in front of you for balance, or stacked on top of the bottom leg if you want more pressure. Less pressure is where almost everyone should start.
The ProsourceFit High Density Foam Roller is a good tool for this because the density does not give out when you load it. Softer budget rollers compress under body weight and you end up just lying on a slightly harder surface, not actually driving pressure into the tissue. High density is important for IT band and quad work in particular because these are dense, thick tissues that need real compression to respond.
Start with maybe 40 percent of your body weight on the roller. You should feel meaningful pressure but you should not be tensing your leg to brace against the pain. Tension is the enemy of myofascial release. If you are clenching, lift some weight off with your top leg or supporting arm.
Step 2: Find the TFL First, Not the IT Band
The TFL, your tensor fasciae latae, sits at the very top of your outer thigh, just below your hip bone and in front of where the IT band begins. This is the muscle that actually generates most of the tension in the IT band. Rolling here first makes every other step more effective. Position the roller just below your hip socket on the outer thigh and roll slowly in a two-inch arc back and forth. You are looking for a tender spot, a place where the pressure noticeably increases. When you find it, stop.
Stay on that spot for 30 to 45 seconds with steady, non-grinding pressure. Breathe out slowly through your mouth. You should feel the tissue gradually soften or the discomfort quietly back down. That is the release you are looking for. If the sensation does not change at all in 45 seconds, move the roller slightly forward or backward a centimeter and try again. Some days the TFL releases immediately. Some days it takes two or three attempts to find the right spot. Do not rush this step because it sets up everything below the hip.
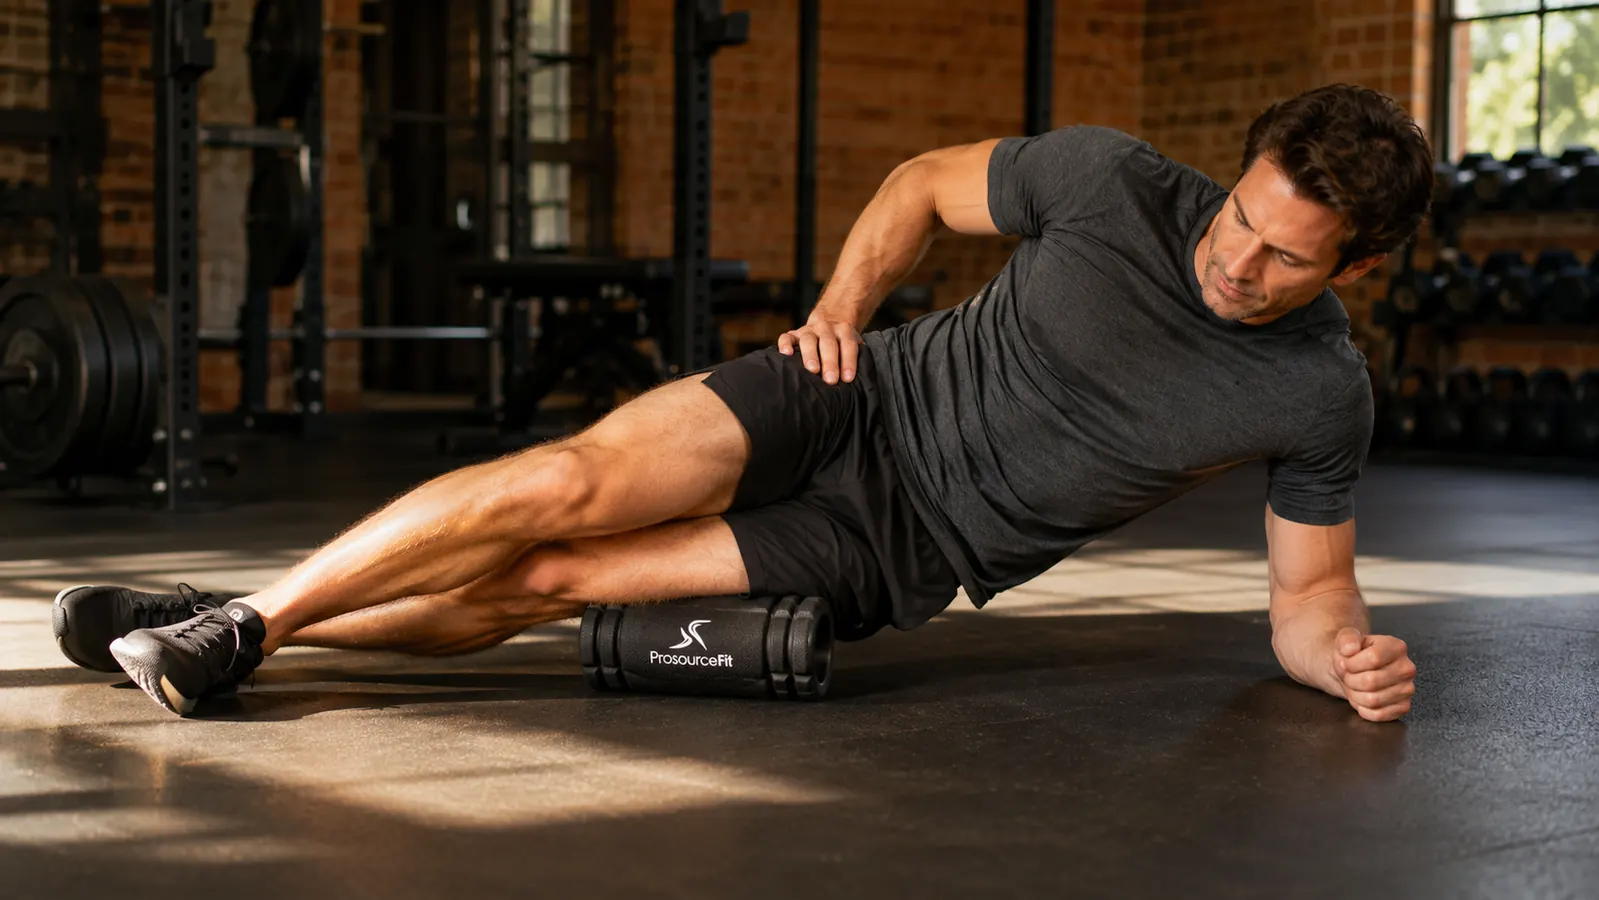
Step 3: Work the Lateral Quad, Not Directly Over the IT Band
This is the step most people skip or do incorrectly. Once the TFL is released, move the roller down from your hip about three to four inches, landing on the lateral quad just inside the IT band. You are now on muscle tissue, which responds to rolling. Slowly sweep back and forth across a four-inch window, from about mid-thigh up toward the hip. Keep your body weight moderate, not maxed out. Spend 60 to 90 seconds here.
When you hit a particularly dense or tender spot in the lateral quad, pause and do the same sustained-pressure hold you did on the TFL: 30 to 45 seconds, steady pressure, slow exhales. Rolling back and forth quickly over these spots is less effective and more painful for no additional benefit. Think slow oscillations with deliberate pauses on the dense spots, not fast scrubbing.
Two zones to avoid: do not park the roller directly on the lateral knee where the IT band inserts just above the knee cap. The tissue there is mostly nerve-dense and bone-adjacent, and compression on that area tends to create sharp, shooting discomfort that is not productive. Similarly, avoid rolling directly on the greater trochanter, the bony point of your hip. Same deal. Stay in the muscular belly zones between these landmarks.
Step 4: Roll the Quads Front-to-Side
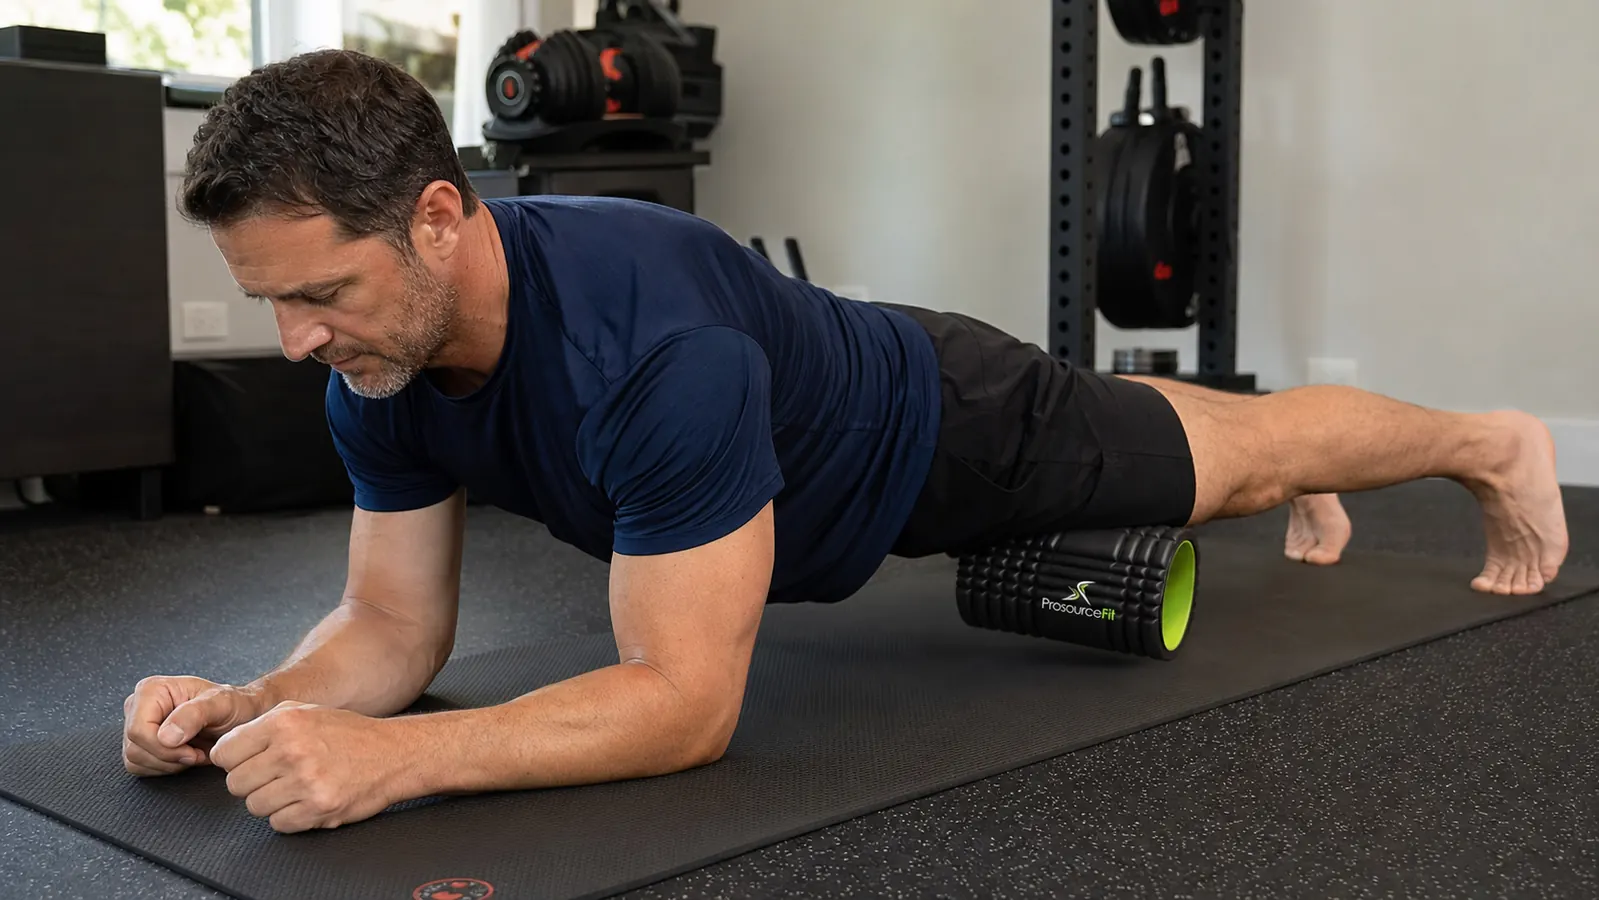
Now rotate from your side position to a forearm plank, face down, with the foam roller under both quads at about mid-thigh. This is the standard quad rolling position, but most people do it too fast and with too little attention to the position of their pelvis. Keep a slight anterior tilt, which means your lower back stays neutral rather than rounded. Rounding your lower back shifts pressure off the quads and puts it on your hip flexors in a weird, unproductive angle.
Slowly roll from just above the knee to just below the hip, taking about three seconds in each direction. When you hit a tight band in the quad, do the same pause-and-hold: stop there, breathe, let the tissue settle for 30 seconds before you continue rolling. Work both quads at the same time or one at a time by shifting your weight slightly left or right. If rolling both simultaneously gives you too much pressure to breathe comfortably, drop to one side.
Spend 90 seconds to two minutes total on the quads. The rectus femoris, which is the central front quad muscle, tends to hold a lot of tension if you run, squat heavy, or sit at a desk all day. Focus extra attention there if you notice it is denser than the area beside it.
Step 5: Finish with the Glute-IT Junction and Stretch
The last rolling position targets the area where the glute and IT band meet near the back and side of the hip. Return to the side-lying position, but this time roll the foam roller slightly behind the centerline of your outer thigh, angling toward the bottom of your glute. This zone runs hot in runners and in lifters who do a lot of lateral movements. Spend 30 to 45 seconds here, using the same slow oscillation and pause method.
After rolling, do not just stand up and walk away. Take two minutes to stretch. A standing hip flexor stretch, a supine figure-four glute stretch, and a simple quad stretch while lying on your side will help the tissues stay longer and reinforce the release you just worked to create. Rolling opens the tissue. Stretching afterward tells the nervous system that the new range of motion is okay to keep. Skipping the stretch is like doing the warm-up without the workout.
Rolling back and forth fast is not the same as foam rolling. The release happens in the pause, not the movement. Most people spend 30 seconds on an area and wonder why nothing changes.
What Else Helps
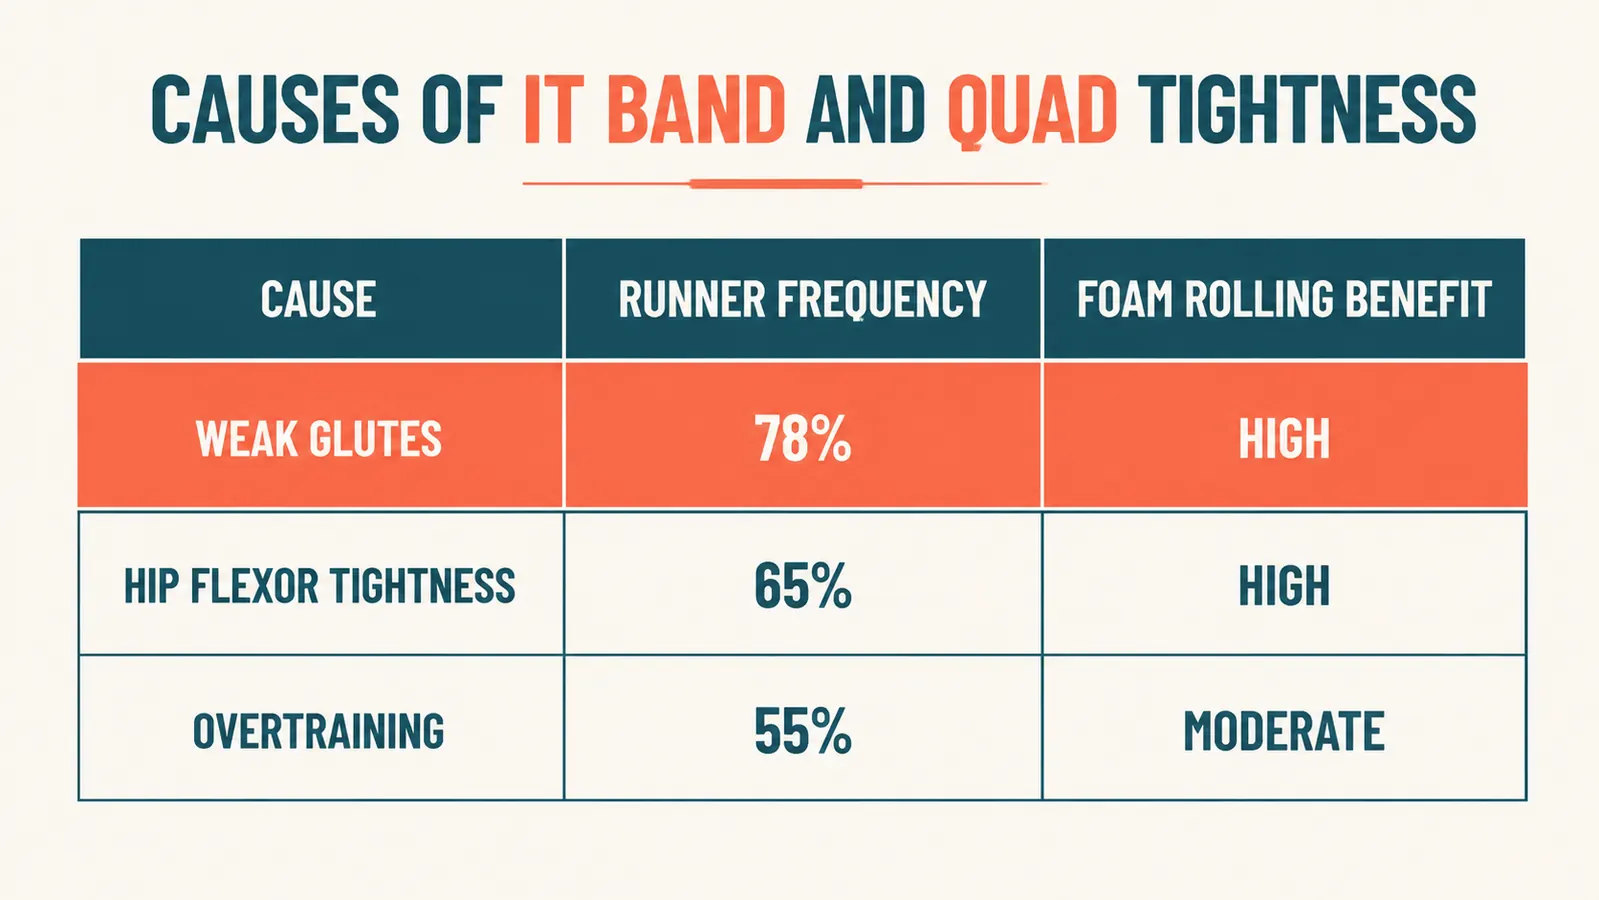
IT band and quad tightness rarely lives in isolation. If you are dealing with chronic outer knee pain or recurring quad soreness, the culprit is usually a combination of weak glutes, tight hip flexors from sitting, and insufficient recovery between heavy leg sessions. The foam rolling protocol above addresses the tissue directly, but strengthening your glute medius with lateral band walks and clamshells, and lengthening the hip flexors through daily low-lunge holds, will reduce how often you need to dig into the roller in the first place. Think of this as maintenance work, not just a fix for when things are already bad.
Hydration also matters more than most people realize. Fascia behaves more like a gel when it is well-hydrated. Rolling first thing in the morning when you are dehydrated produces different results than rolling in the evening after a full day of drinking water. If you tend to roll before a workout to warm up, do it after a glass of water, not immediately out of bed. That one habit change alone improved how my IT band responded by a noticeable margin.
For more foam rolling techniques beyond the IT band and quads, including how to work the thoracic spine, calves, and hip flexors, the full breakdown is in the foam rolling techniques guide. And if you are evaluating the ProsourceFit roller against other options before you commit, the long-term review covers 18 months of daily use with specifics on density, durability, and whether it is worth it over a more expensive roller.

If your current roller bottoms out, you are not actually rolling anything
High-density foam is what separates a real myofascial release session from just lying on the floor uncomfortably. The ProsourceFit 12-inch roller is one of the few budget options that holds its shape under full body weight, which matters a lot for IT band and quad work.
Amazon Check Today's Price on Amazon →